Why You’ll Love This Recipe
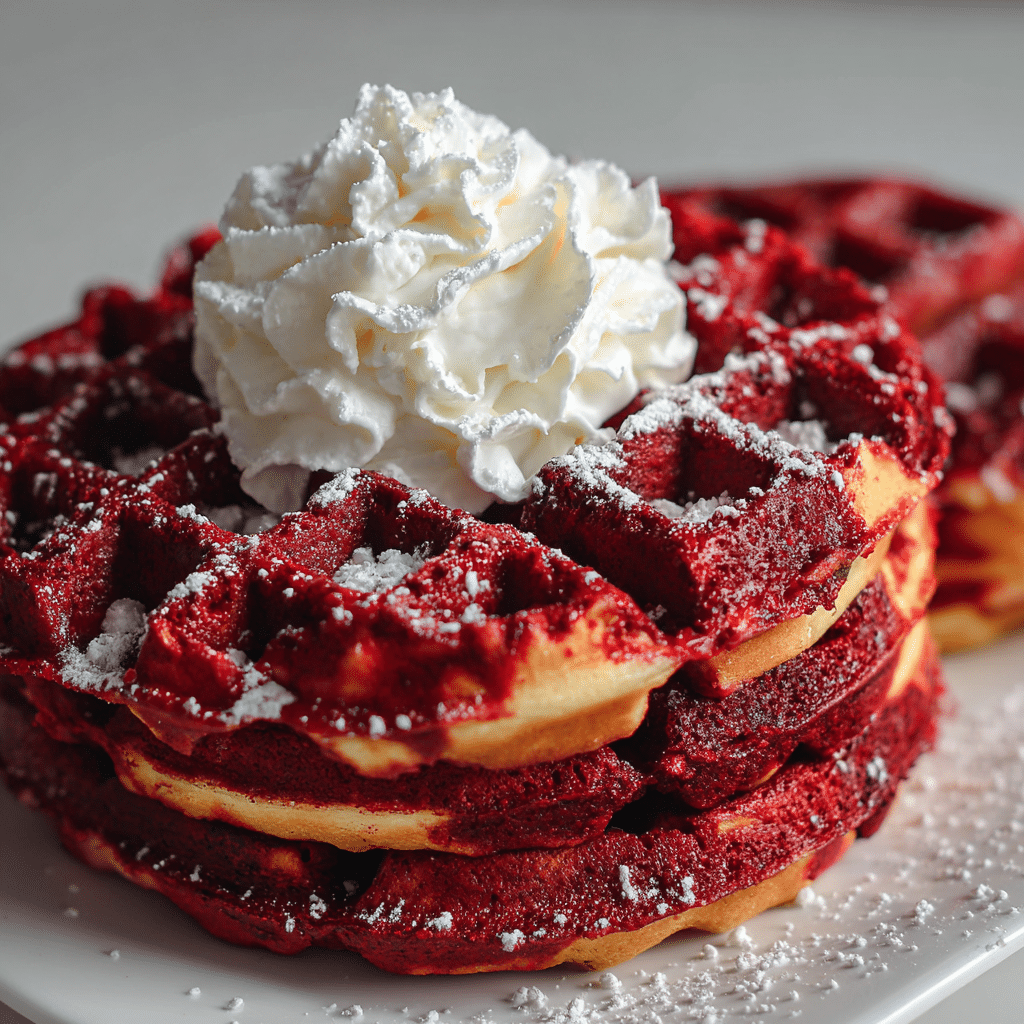
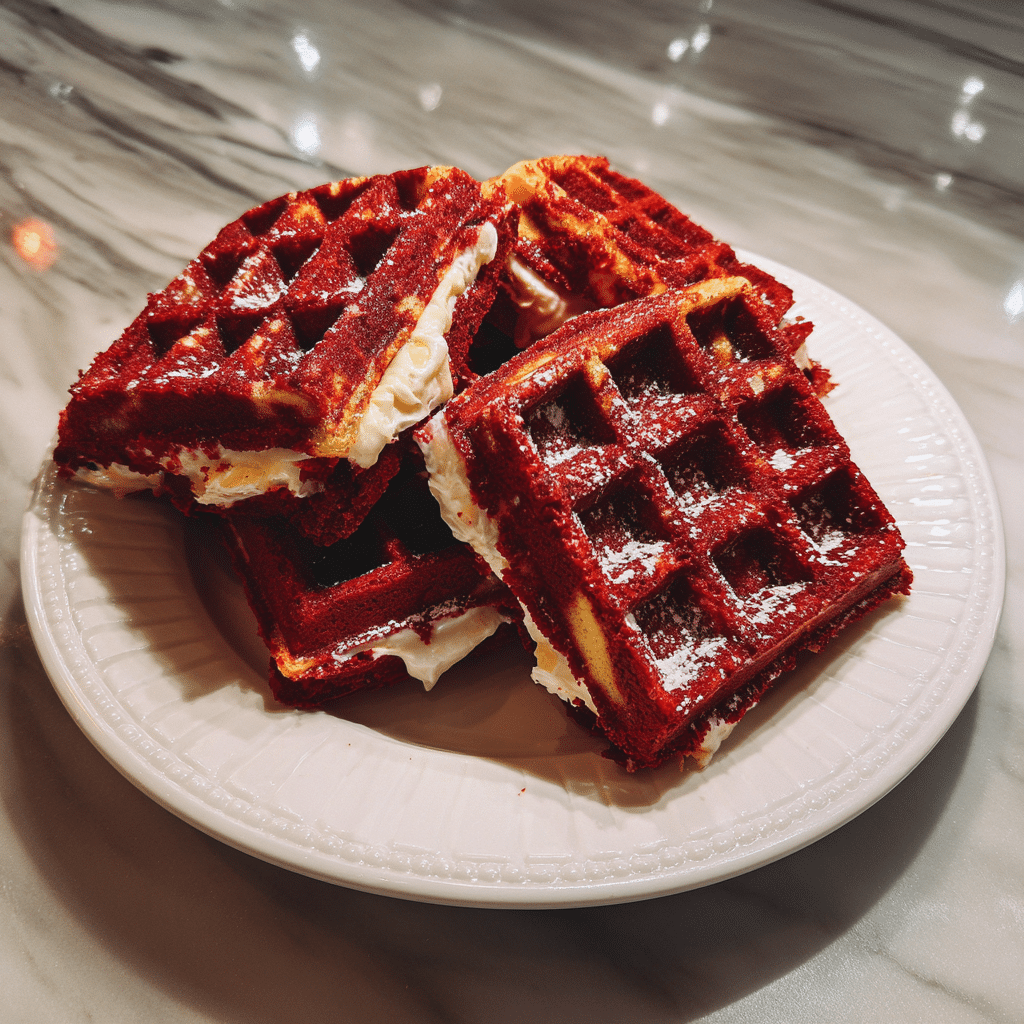
Red Velvet Marble Waffles bring elegance and fun to the breakfast table with their striking swirls of deep red and classic vanilla batter. These waffles offer the unmistakable cocoa warmth of red velvet balanced by the buttery richness of traditional waffles. I once made them with buttermilk instead of regular milk, and the tang complemented the cocoa beautifully. Whether served for brunch, Valentine’s Day, or a special weekend treat, these waffles impress with both flavor and appearance. They are wonderfully soft inside with a crisp golden exterior—perfect for holding pools of syrup or a dusting of powdered sugar. The marble effect is surprisingly simple to achieve, making this recipe accessible even if you are not an experienced baker. If you enjoy recipes that combine creativity, bold flavors, and a touch of whimsy, these Red Velvet Marble Waffles are sure to become a favorite.
Print
Red Velvet Marble Waffles: A Stunning Twist on a Breakfast Classic
- Total Time: 25 mins
- Yield: 6 waffles
- Diet: Vegetarian
Description
Beautifully swirled waffles combining classic vanilla batter with rich red velvet for a striking marble effect and decadent flavor.
Ingredients
- 2 cups all-purpose flour
- 2 tbsp granulated sugar
- 1 tbsp baking powder
- 1/2 tsp salt
- 2 large eggs
- 1 3/4 cups milk
- 1/3 cup melted butter
- 1 tsp vanilla extract
- Red Velvet Portion:
- 2 tbsp cocoa powder
- 1 tbsp additional sugar
- 1 tsp red food coloring (more as needed)
Instructions
- Preheat waffle iron according to manufacturer instructions.
- In a large bowl, whisk together flour, sugar, baking powder, and salt.
- In a separate bowl, whisk eggs, milk, melted butter, and vanilla until smooth.
- Pour wet ingredients into dry ingredients and mix until just combined.
- Transfer 1/3 of the batter into a separate bowl to create the red velvet portion.
- To the smaller portion, add cocoa powder, extra sugar, and red food coloring. Stir until smooth.
- To make marble waffles, add spoonfuls of both batters to the hot waffle iron, swirling lightly with a knife.
- Close the iron and cook until waffles are golden and crisp.
- Repeat with remaining batter and serve warm.
Notes
- Do not overmix the batters when swirling—light swirls give the best marble effect.
- Top with cream cheese glaze for a classic red velvet pairing.
- Use gel food coloring for a deeper red hue.
- Prep Time: 10 mins
- Cook Time: 15 mins
- Category: Breakfast
- Method: Waffle Iron
- Cuisine: American
Ingredients
(Tip: You can find the complete list of ingredients and their measurements in the recipe card below.)
All-purpose flour
This forms the base of the batter, offering structure while keeping the waffles tender. A good-quality flour ensures a consistent texture and even browning.
Sugar
Sugar provides sweetness and helps the waffles develop a crisp exterior. It also balances the cocoa notes from the red velvet batter.
Baking powder
This leavening agent ensures the waffles rise properly, creating a fluffy interior. Fresh baking powder is important for the best lift.
Salt
A pinch of salt enhances the flavors and keeps the waffles from tasting flat.
Milk or buttermilk
Milk creates a smooth batter, while buttermilk adds tang and tenderness—either choice produces excellent waffles.
Eggs
Eggs bind the batter and contribute to the waffles’ airy structure. They also help achieve a crisp, golden finish.
Butter
Melted butter adds richness and moisture. It also prevents the waffles from drying out while cooking.
Vanilla extract
Vanilla enhances both the plain and red velvet portions of the batter, deepening the overall flavor.
Cocoa powder
This ingredient provides the signature red velvet taste—subtle chocolatey warmth without overpowering sweetness.
Red food coloring
A small amount creates the bold red hue characteristic of red velvet recipes.
Directions
Begin by preheating your waffle iron. In a large bowl, whisk together the flour, sugar, baking powder, and salt. In a separate bowl, whisk the eggs, milk (or buttermilk), melted butter, and vanilla extract until the mixture is smooth. Pour the wet ingredients into the dry ingredients, stirring just until combined; avoid overmixing to keep the waffles tender.
Divide the batter into two bowls. Leave one as the classic vanilla portion. In the second bowl, whisk in the cocoa powder and red food coloring until the color is vibrant and even. If the red batter thickens slightly, add a teaspoon of milk to loosen it.
To create the marble effect, spoon small dollops of each batter onto the preheated waffle iron, alternating colors. Use a toothpick or the tip of a knife to gently swirl the batters together without fully blending them. Close the iron and cook until the waffles are crisp and lightly browned.
Carefully remove the waffles and serve immediately with butter, syrup, whipped cream, or a drizzle of cream cheese glaze. The marbled pattern will reveal itself beautifully once sliced or plated.
Essential Equipment
Must-Have Tools to Get Rolling
Here’s what you’ll want to have on hand:
Silicone Spatula – Durable, heat-resistant silicone spatula perfect for mixing, scraping, and spreading. Gentle on non-stick cookware and easy to clean.
Large pot – You’ll need this to boil the whole cabbage head and soften the leaves.
large bowl –Spacious, durable large bowl ideal for mixing, serving, or food preparation. Made from sturdy material and easy to clean.
Sharp knife – For coring the cabbage and slicing out the thick stem in each leaf. A paring knife works best.
Mixing bowl – A big bowl makes it easier to combine your meat and rice filling evenly.
Cutting board – For prepping cabbage leaves and rolling them like a pro.
9×13-inch baking dish – Ideal size to fit your rolled cabbage leaves snugly and prevent them from unraveling.
knife – A sharp, durable kitchen knife perfect for slicing, chopping, and dicing with ease.
Servings and timing
This recipe makes 6–8 waffles depending on the size of your waffle iron. Preparation takes about 10 minutes, and cooking requires 3–5 minutes per waffle. Total estimated time: 20–30 minutes.
Storage/reheating
Store leftover waffles in an airtight container in the refrigerator for up to three days. Reheat in a toaster or 300°F oven for 5–7 minutes to restore crispness. These waffles also freeze well—place them in a single layer until frozen, then store in freezer-safe bags. Reheat from frozen in the toaster or oven until warm and crisp.
Variations and Customizations
Cream Cheese Swirl Waffles
Add small dollops of softened sweetened cream cheese into the batter before closing the waffle iron.
Chocolate-Chip Marble Waffles
Sprinkle mini chocolate chips into the red velvet portion for extra richness.
Pink Velvet Version
Use less cocoa and a touch of pink coloring for a softer pastel marble effect.
Gluten-Free Alternative
Use a cup-for-cup gluten-free flour blend; the marbling effect still works well.
Citrus Twist
Add a teaspoon of orange zest to the vanilla batter for a subtle citrus contrast.
Red Velvet Mocha Waffles
Stir a teaspoon of instant espresso into the cocoa batter for deeper flavor.
Nutty Finish
Top the finished waffles with chopped pecans or walnuts for added crunch.
Cream Cheese Glaze
Whisk cream cheese, powdered sugar, and lemon juice into a pourable glaze for a bakery-style finish.
Holiday Marble Waffles
Use green food coloring in the vanilla batter to create festive red-and-green waffles.
Protein-Enriched Version
Add a scoop of vanilla or chocolate protein powder, adjusting the milk as needed to maintain consistency.
FAQs
Can I make the batter ahead of time?
Yes, refrigerate it for up to 12 hours, stirring gently before using.
Can I omit the food coloring?
Yes, though the waffles will lose the classic red velvet appearance.
Can I use oil instead of butter?
Yes, but butter provides better flavor and crispness.
Will the marble pattern affect cooking time?
No, cook time remains the same as standard waffles.
Can I use whole wheat flour?
You may substitute half the flour, though the texture will be denser.
Can I freeze the waffles?
Yes, they freeze and reheat very well.
How do I prevent waffles from becoming soggy?
Place them on a wire rack instead of stacking to maintain crispness.
Can I add more cocoa for stronger flavor?
Yes, but adjust the milk slightly to maintain the batter’s consistency.
Is buttermilk better than regular milk?
Buttermilk adds tang and tenderness but both options work well.
Can I use natural food coloring?
Yes, though expect a more muted red tone.
Conclusion
Red Velvet Marble Waffles offer an eye-catching and delicious departure from everyday breakfast recipes. With their rich red swirls, soft interior, and crisp edges, they bring a touch of elegance to any meal while remaining simple and approachable. The marble technique allows for endless creativity, and the flavor is a perfect balance of vanilla sweetness and gentle cocoa warmth. Serve them warm with your favorite toppings, and enjoy a breakfast that feels both festive and unforgettable.
Looking for more tasty recipes? Visit our website for full details and follow us on Pinterest for daily food ideas to save and share