Why You’ll Love This Recipe
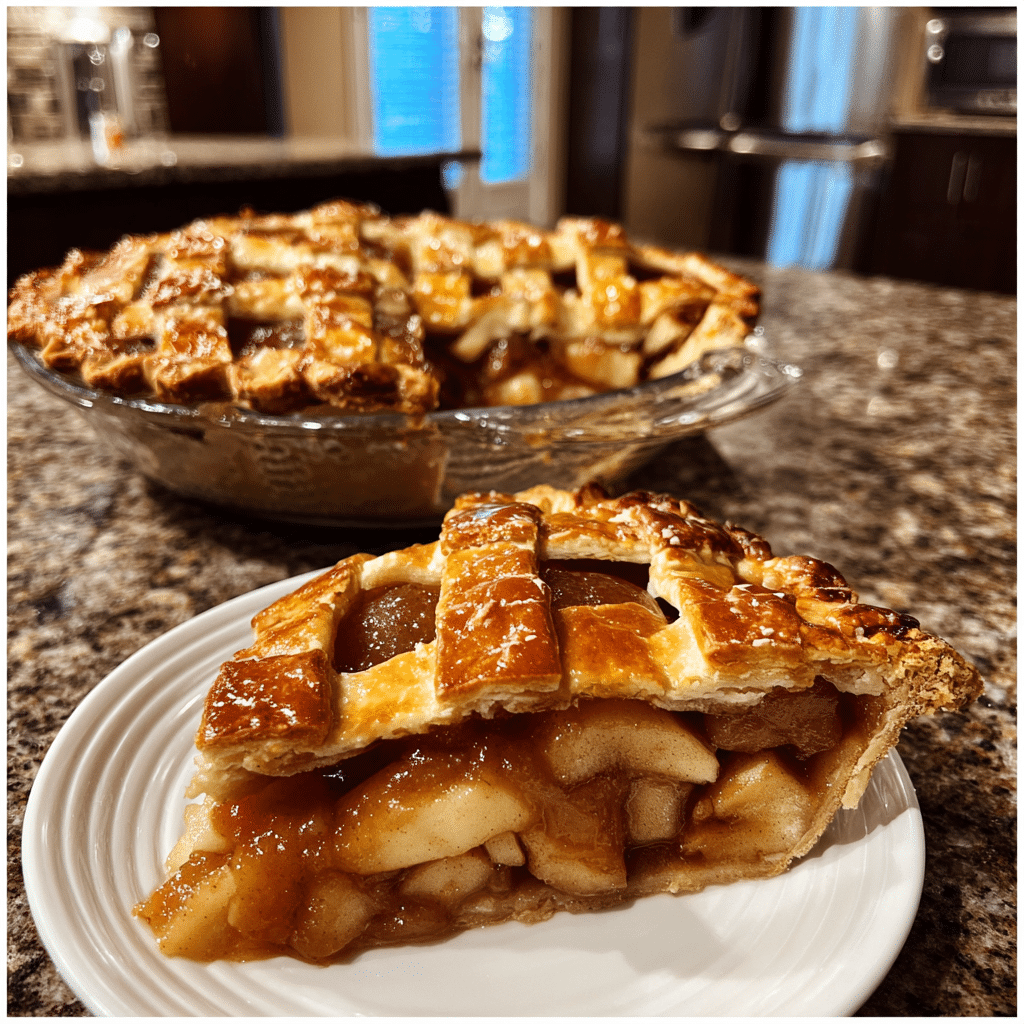
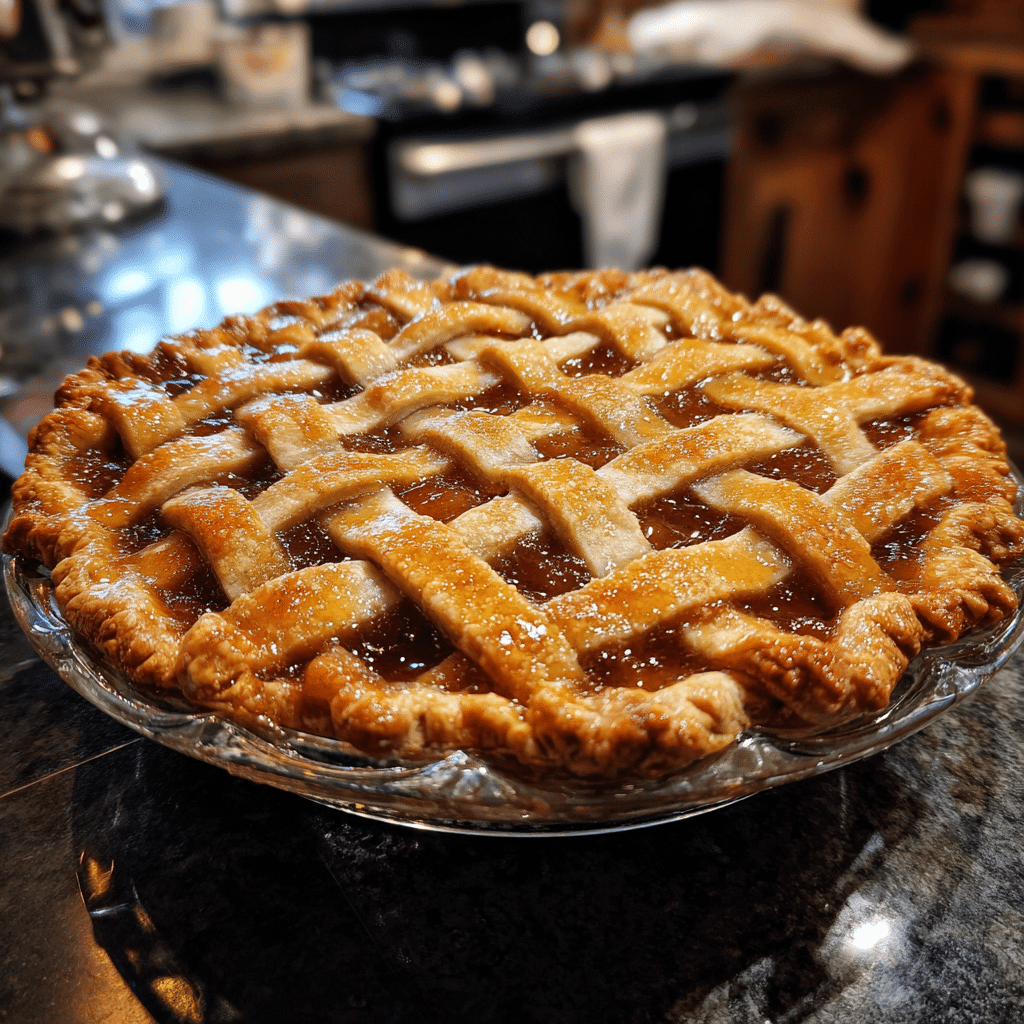
Apple Butter Pie is the perfect dessert for anyone who loves warm spices, silky custard textures, and classic fall flavor. It transforms cozy apple butter into a rich, creamy filling that tastes like pumpkin pie’s elegant cousin—smooth, fragrant, and lightly sweet with deep apple undertones. The texture is velvety, the spice blend is comforting, and the aroma while baking is pure autumn heaven. I once added a touch of maple syrup to the filling, and the subtle caramel notes made the pie even more inviting without overpowering the apple. What makes Apple Butter Pie truly special is how effortless it is: simple ingredients whisked together and baked into a custard-style filling that slices cleanly and serves beautifully. Whether for Thanksgiving, fall gatherings, or a cozy weekend dessert, this pie captures the essence of the season in every bite.
Print
Apple Butter Pie: A Silky, Spiced, Fall-Inspired Twist on Classic Custard Pie
- Total Time: 60 mins
- Yield: 8 servings
- Diet: Vegetarian
Description
A rich, creamy apple butter pie with warm spices and a smooth custard-like filling baked in a flaky pie crust—similar to pumpkin pie but with deep apple flavor.
Ingredients
- 1 unbaked 9-inch pie crust
- 1 cup apple butter
- 1 cup evaporated milk
- 3 large eggs
- 1/2 cup brown sugar
- 1 tsp cinnamon
- 1/4 tsp nutmeg
- 1/4 tsp ginger
- 1/4 tsp salt
- 1 tsp vanilla extract
Instructions
- Preheat oven to 375°F (190°C).
- Place the unbaked pie crust in a 9-inch pie dish and flute or crimp the edges.
- In a large bowl, whisk together apple butter, evaporated milk, eggs, brown sugar, cinnamon, nutmeg, ginger, salt, and vanilla until smooth.
- Pour the filling into the prepared pie crust.
- Bake for 45–50 minutes, or until the center is set and no longer jiggly.
- Cool completely before slicing to allow the filling to firm up.
- Serve plain or with whipped cream.
Notes
- Use homemade apple butter for maximum flavor.
- If edges brown too quickly, cover with foil.
- For a spicier pie, add extra cinnamon or cloves.
- Chill for 2–3 hours for cleaner slices.
- Prep Time: 10 mins
- Cook Time: 50 mins
- Category: Dessert
- Method: Baking
- Cuisine: American
Ingredients
(Tip: You can find the complete list of ingredients and their measurements in the recipe card below.)
Pie crust (homemade or store-bought)
The crust provides structure and a subtle buttery foundation for the silky filling.
Apple butter
Apple butter is the star ingredient—it gives the pie its deep apple flavor, warm spices, and naturally sweet profile.
Eggs
Eggs help set the custard filling, giving it its smooth, sliceable texture.
Brown sugar
Brown sugar adds warmth, mild sweetness, and a hint of molasses depth.
Heavy cream or evaporated milk
These create the creamy custard base, enhancing the pie’s silky texture.
Cinnamon
Cinnamon complements the apple butter and deepens the fall flavor.
Nutmeg
Nutmeg adds aromatic warmth and complexity.
Vanilla extract
Vanilla rounds out the spices and enhances the pie’s overall richness.
Salt
A pinch of salt balances sweetness and sharpens flavors.
Directions
Preheat your oven to 350°F. Place your pie crust into a pie dish and crimp the edges. Partially blind bake the crust for 8–10 minutes to prevent sogginess. Set aside.
In a large bowl, whisk together the apple butter, eggs, brown sugar, cream or evaporated milk, cinnamon, nutmeg, vanilla, and salt until the mixture is completely smooth.
Pour the filling into the warm pie crust and smooth the top with a spatula. Transfer the pie to the oven and bake for 45–55 minutes, or until the edges are set and the center has a slight jiggle. If the crust begins to brown too quickly, cover the edges with foil.
Allow the pie to cool completely on a wire rack before slicing. This helps the custard set fully. Serve at room temperature or chilled, with whipped cream if desired.
Essential Equipment
Must-Have Tools to Get Rolling
Here’s what you’ll want to have on hand:
Silicone Spatula – Durable, heat-resistant silicone spatula perfect for mixing, scraping, and spreading. Gentle on non-stick cookware and easy to clean.
Large pot – You’ll need this to boil the whole cabbage head and soften the leaves.
large bowl –Spacious, durable large bowl ideal for mixing, serving, or food preparation. Made from sturdy material and easy to clean.
Sharp knife – For coring the cabbage and slicing out the thick stem in each leaf. A paring knife works best.
Mixing bowl – A big bowl makes it easier to combine your meat and rice filling evenly.
Cutting board – For prepping cabbage leaves and rolling them like a pro.
9×13-inch baking dish – Ideal size to fit your rolled cabbage leaves snugly and prevent them from unraveling.
knife – A sharp, durable kitchen knife perfect for slicing, chopping, and dicing with ease.
Servings and timing
This pie serves 8 people. Preparation takes about 15 minutes, baking takes 45–55 minutes, and cooling requires at least 2 hours. Total estimated time: approximately 3 hours including cooling.
Storage/reheating
Store the pie covered in the refrigerator for up to three days. Serve cold or let it rest at room temperature before enjoying. Freezing is possible—wrap slices individually and store up to one month—but thaw gently in the refrigerator overnight for best texture.
Variations and Customizations
Maple Apple Butter Pie
Add a tablespoon of maple syrup for deeper fall sweetness.
Brown Butter Apple Pie
Brown the cream gently before mixing it in for nutty, caramel notes.
Ginger-Spiced Version
Add ground ginger for brightness and a bit of heat.
Graham Cracker Crust
Swap the pastry crust for a graham crust to add sweetness and crunch.
Streusel Topping
Top with crumble before baking for extra texture.
Salted Caramel Drizzle
Finish slices with warm caramel and a touch of flaky salt.
Vanilla Bean Apple Butter Pie
Use vanilla bean paste for a more aromatic, gourmet finish.
Pecan Layer Bottom
Scatter chopped pecans in the bottom of the crust before adding the filling.
Pumpkin-Apple Fusion
Mix a few tablespoons of pumpkin puree into the batter for a hybrid flavor.
Whipped Mascarpone Topping
Top with lightly sweetened mascarpone for creamy richness.
FAQs
Does apple butter make the filling too sweet?
No, apple butter is naturally sweet but balanced by spices and cream.
Can I use a pre-made crust?
Yes—store-bought crust works perfectly.
Should I chill the pie before slicing?
Chilling helps the custard set and gives cleaner slices.
Can I use milk instead of cream?
You can, but the texture will be slightly less rich.
What if the center still jiggles?
A slight jiggle is fine—the pie sets as it cools.
Can I make this pie ahead of time?
Yes, it keeps beautifully for up to 48 hours.
Is apple butter the same as applesauce?
No, apple butter is thicker, richer, and more spiced.
Can I add more spices?
Absolutely—adjust cinnamon, nutmeg, or add cloves or allspice.
Why is my crust getting too dark?
Cover edges with foil halfway through baking.
Should the pie be served warm or cold?
It’s best served chilled or at room temperature.
Conclusion
Apple Butter Pie is a silky, richly spiced dessert that captures all the warmth and comfort of fall in a single slice. With its custard-like texture and deep apple flavor, it’s an elegant twist on traditional holiday pies—and one that’s wonderfully simple to prepare. Whether topped with whipped cream, served plain, or enhanced with a drizzle of caramel, this pie brings cozy seasonal flavor to any table. Enjoy each bite and savor the sweetness of a dessert that truly embodies autumn baking at its best.
Looking for more tasty recipes? Visit our website for full details and follow us on Pinterest for daily food ideas to save and share